A well-maintained deck is a valuable asset to any home, providing a space for outdoor relaxation and entertainment. But you need to know how to maintain it to keep it looking new. Sealing your deck is not a difficult DIY home improvement project if you know how to seal a deck. With the right tools and products, you can extend the lifespan of your deck and keep it looking new for a longer period of time.

That’s why the decking materials experts at Capitol City Lumber in Raleigh are sharing the steps for sealing a deck, including details for preparing the deck, choosing the right sealant, and applying the sealant properly. Let’s review some tips on how to seal a deck and why it’s so important.
Why Is it Important to Seal a Deck?
You may think that since your deck is built with treated wood or wood that is naturally resistant to rot and decay, sealing it is not necessary. But, wood has a finite life in most weather conditions. The sun’s harmful UV rays will start to dry out the wood. When this happens, it is more vulnerable to rot and fungus growth.
Heavy rain, heat, moisture from hot tubs, and snowfall can also wreak havoc on your new deck when it’s not sealed. Adding a wood sealant creates a waterproof seal that nourishes the wood, preventing moisture from seeping in. Sealants with a stronger pigment color will help protect against UV rays. This prevents fading and keeps your deck looking newer for longer.
Choose Your Decking Materials
When it comes to the best wood for outdoor use, there are several types of decking materials that can be sealed to help protect and preserve their appearance. So when learning how to seal a deck, the first step is to know how to choose the proper decking material and hardware.
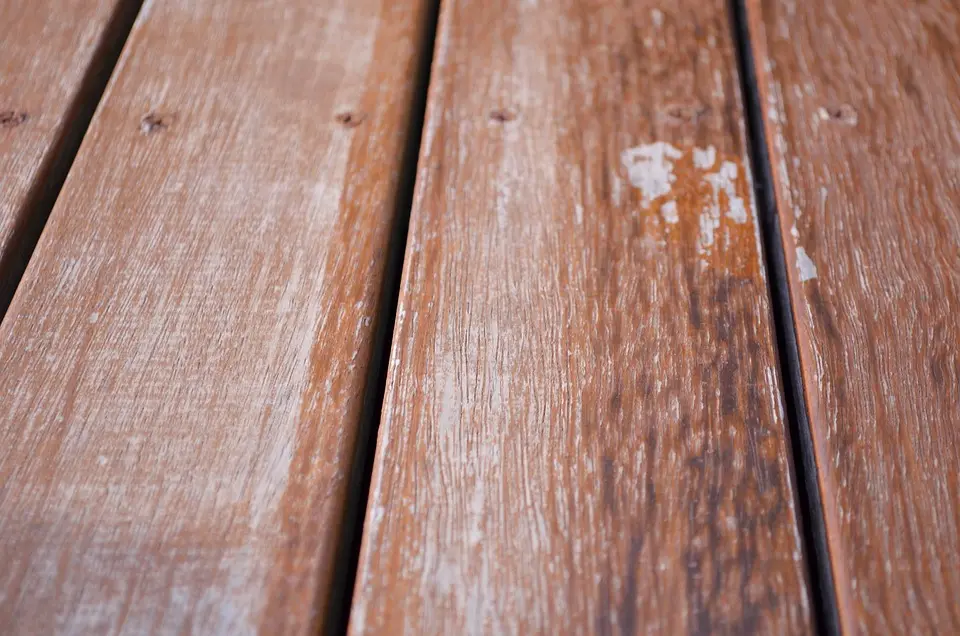
Treated Lumber (Kiln-Dried Treated Decking)
Treated lumber is a popular choice for decking material due to its affordability and durability. It can be easily sealed and stained to improve its appearance and protect it from the elements. Kiln-dried treated decking is particularly well-suited for outdoor use, as the drying process after being treated will help to minimize warping and twisting that is characteristic of treated pine wood.
Cedar Wood
Cedar is a popular decking material due to it being sustainable, it’s natural beauty and resistance to rot and decay. It is easy to work with and can be sealed and stained to protect it from the elements. Cedar’s wood grain is straighter and more stable than Pine, allowing for a deck with less warping and twisting. However, cedar decking is softer than Treated. Regular maintenance, such as cleaning and resealing will maintain Cedar’s appearance and provide a longer life.
Accoya Wood
Accoya wood is a relatively new decking material that is gaining popularity due to its durability, stability, and resistance to decay and rot. A non-toxic sustainable decking that is 100% recyclable, it is a green choice. It is particularly well-suited for outdoor use with a 25 to 50 year warranty. It can withstand harsh weather conditions and moisture without warping or shrinking. Accoya wood can be sealed and stained to improve its appearance and protect it from the elements, but can also be left unsealed to turn a silver gray color. If sealing Accoya, it is recommended to use a stain that has a mildewcide. Accoya wood must be installed with Stainless Steel hardware and a deck wrap where Accoya will touch any treated joists.
Ipe Wood
Ipe wood is a high-end decking material that is known for its beauty, strength, durability, and natural resistance to rot and decay. Ipe has a beautiful exotic look, and also known as ironwood. Ipe typically has a longer lifespan compared to Treated or Cedar wood. It is a popular choice for high-end outdoor projects, such as decks and patios. Ipe wood is difficult to work with and may require pre-drilling when installing. It can be sealed and stained to enhance its natural beauty and protect it from the elements or left natural to become weathered gray. However, due to its density, ipe wood works better with stains designed for hardwoods.
Composite Lumber
Composite lumber is a popular alternative to traditional wood decking materials. It is made from a combination of wood fibers and plastic, which makes it more durable and resistant to rot, decay, and insect damage than natural wood. Composite lumber is also low-maintenance, as it does not require staining or sealing to maintain its appearance.
Does Composite Decking Require Sealing?
While composite lumber does not require sealing to maintain its durability, it can be sealed to enhance its appearance and protect it from fading and staining over time. However, it is important to note that not all types of composite lumber can be sealed. Some manufacturers may recommend against sealing their products, as it can impact the appearance and performance of the decking material.
Composite Decking vs Wood Decking: Which is Better?
The choice between composite and wood decking ultimately comes down to personal preference, budget, and maintenance preferences for your DIY home improvement job. Composite decking is a more durable and low-maintenance option but is more expensive than some wood decking.
Wood decking offers a natural look and feel and is often cooler in summer months, but requires regular maintenance to maintain its appearance and durability. Let’s look closer at some of the differences between choosing composite lumber vs traditional wood for a new deck.
Appearance
Wood decking has a natural look and feel that many people prefer, and it can be stained or painted in a variety of colors to match your desired look. Composite decking is available in a wide range of colors and styles, but some products may have a more “plastic” look and feel.
Durability
Composite decking is generally more durable than some wood decking. It is resistant to rot, decay, and insect damage, and can withstand harsh weather conditions without warping or cracking. Some wood decking requires regular maintenance to prevent rot, decay, and insect damage, and may warp or crack over time if not properly maintained.
Maintenance
Composite decking is low-maintenance and does not require staining or sealing to maintain its appearance. It can be cleaned with soap and water and a little scrubbing. Some wood decking requires regular maintenance, including staining or sealing, to protect it from the elements and maintain its appearance.
Cost
Composite decking is generally more expensive than treated or Cedar wood decking, but it can be a more cost-effective option over the long term due to its durability and low maintenance requirements. Treated or Cedar Wood decking is more affordable upfront, but may require more frequent maintenance and replacement over time.
Environmental Impact
Composite decking can be made from recycled materials and is generally considered to be a more environmentally sustainable option than some wood decking materials, which may contribute to deforestation if not sourced responsibly.
Slipperiness
Some composite decking can be more slippery than wood decking, especially when wet. This can be mitigated by choosing a product with a low-slip surface, textured surface or applying a non-slip coating. Wood decking can also be slippery when wet, but may be less so than composite decking.
Step-by-Step Guide on How to Seal a Deck
Sealing a deck is an important step in protecting it from the elements and maintaining its appearance over time. It is typically recommended to wait at least 1 year between sealings. While it is recommended to have a professional seal your deck, it is possible to achieve good results through DIY home improvement by doing it yourself with the right tools and materials, as well as with the right knowledge of the steps to take to get the job done right.
When it comes to how to seal a deck, there are three steps:
- Cleaning the deck
- Choosing a sealant
- Applying the sealant to your deck
Step 1: Prepare a Deck for Sealant
Before applying any sealant, it’s important to prepare the deck surface properly. Start by cleaning the deck thoroughly, removing any dirt, grime, or mildew that has accumulated over time. It is recommended to use a deck cleaner to get the job done. Some deck cleaners will also have a deck brightener to help uniform the appearance of the wood before re-staining. It is not recommended to power-wash your deck unless absolutely necessary.
Look for any dirt and debris between the boards on your deck. Use a putty knife or a screwdriver to loosen anything that may be lodged. Then, sweep away any debris so you have a clean slate.
You’ll then want to use a deck cleaner to make sure the wood is clean before you apply the sealant. If you notice any mold or mildew stains on a cedar or redwood deck, use a deck brightener to help remove these stains before sealing your deck.
Choose a cloudy day to apply the deck cleaner. This will prevent the sun from drying it out too fast. You’ll also want to protect any nearby plants or shrubs with a plastic sheet before you start.
Use a paint roller, garden sprayer, or bristle brush to apply the deck cleaner. Always work from the bottom up when cleaning wood railings and posts. Working from the top down can lead to spills and spots that are hard to remove.
Follow the directions on the deck cleaner so that you apply it correctly and remember to rinse thoroughly. You’ll want to wait at least 48 hours before applying a deck sealer.
Once the deck is clean, sand the surface lightly to remove any rough spots or splinters. Be sure to pay special attention to any areas that have been damaged, such as cracks or splits. These areas should be repaired before moving on to the next step.
Step 2: Choose a Deck Sealant
Not all deck sealers are made equal. The more opaque the sealer, the better it is at fighting the elements. If you choose a lighter finish, more of the wood’s natural grain will shine through. The lighter the pigment in the deck sealant, the more often you’ll have to clean and seal it, so always keep that in mind.
At Capitol City Lumber, we offer TWP 100 Series Deck Wood Sealer. This pre-mixed deck sealer is an excellent choice and is available in 8 popular colors. It also resists splitting, warping, and cracking.
There are different types of sealants available, so it’s important to choose the right one for your deck. For example, water-based sealants are easy to apply and dry quickly, but they may not be as durable as oil-based sealants.
Oil-based sealants, on the other hand, are more durable and provide better protection against moisture, but they take longer to dry and may emit more fumes. Consider factors such as your climate, sun exposure, the level of foot traffic your deck sees, and the type of wood your deck is made of when choosing a sealant.
Here are some options to consider:
- Clear sealants: Clear sealants are a popular choice for deck sealing because they allow the natural wood grain to show through while still providing protection against moisture and UV rays. Clear sealants allow the wood to fade to a natural weathered gray.
- Tinted sealants: Tinted sealants are similar to clear sealants, but they add a subtle color to the wood, which can enhance the appearance of the deck and protect against UV rays. Tinted sealants are available in a range of colors, from light natural tones to darker shades.
- Semi-transparent stains: Semi-transparent stains are a good option if you want to add color to your deck without completely covering the wood grain. Semi-transparent stains allow some of the wood’s natural beauty to show through while still providing protection against moisture and UV rays. The darker the stain, the more protection against harmful UV rays.
- Solid stains: Solid stains are a popular alternative to traditional paint because they provide more coverage. Solid stains allow little to no grain to show through. Solid stains are available in a range of colors and can help hide imperfections in the wood. Solid stain, however, will often flake like paint over time and can cause more maintenance over time.
When choosing your sealing solution, it’s important to consider factors such as your deck’s exposure to the weather and sun, the level of maintenance you are willing to perform, and your aesthetic preferences. It’s also important to follow the manufacturer’s instructions for application and maintenance to ensure the best results.
Step 3: Applying a Deck Sealant
Once you’ve chosen your deck sealant, check the weather for two clear days when the temperatures will be between 50 and 80 degrees. Before you begin, ensure that it has been two days since the deck cleaning or rain event and the deck is completely dry. You’ll also need the right tools and materials, including a paint roller, paintbrush, and a clean cloth.
Apply the sealant evenly, working in sections and making sure to blend the sections together to avoid any lap marks. Be sure to follow the manufacturer’s instructions for drying time and any additional coats that may be necessary.
Pay special attention to any cracks, splits, or damaged areas on the deck. These areas may need to be coated with an extra layer of sealant to prevent further damage. Once you’ve covered the entire deck surface, go back and check for any missed spots or areas where the sealant may have pooled. Use a clean cloth to wipe away any excess sealant.
- Sand the deck to remove any grain that was raised from washing it.
- Thoroughly sweep or vacuum when you’re done.
- Check for any nail heads or popped screws and fix those before applying the sealant.
- Use painter’s tape on any siding, or any other areas you want to protect.
- Using a natural bristol brush, begin to apply the sealant, being sure the sealer gets into the joints where any two boards come together. You can also choose to use a paint roller if you have a larger area to cover.
- Apply the sealer to three or four boards at the same time.
- Be careful not to spill or overlap onto adjacent boards, this will lead to splotches that are hard to hide.
- Let the deck dry for at least 24 to 48 hours before walking on it.
When you’re sealing your deck you may be tempted to go over it a second time with another coat. But, check with the manufacturer of that stain. Some stains require a second coat within a certain amount of minutes called a wet-on-wet application, and other stains recommend just one coat. Adhering to the manufacturer’s coating requirements will provide you with enough protection until it’s time to seal your deck again.
Quick tip: In addition to sealing your deck, it’s important to maintain it regularly to keep it in good condition. Regularly cleaning your deck, removing debris and fallen leaves, and checking for any signs of damage is a good place to start. It’s also important to protect your deck from sun and moisture damage by applying a protective coating periodically.
FAQ About How to Seal a Deck
When is the right time to seal my deck?
If your deck is brand new, you might not need to seal it right away. Freshly processed pressure-treated wood won’t be able to absorb the sealant well, so it won’t be that effective.
To see if it is the right time to seal your deck, pour a small amount of water on the wood. If it absorbs quickly, it’s time to add a sealant. But, if the water pools and sits on top of the wood, you’ll want to wait a few more days.
How often should I seal my deck?
It’s generally recommended to seal your deck every year or two. Extremely hot summers or harsh winters can cause the sealant to wear away. Wear and tear from outdoor furniture and people walking on your deck will also make you want to keep up on your deck sealing.
Why Does Pressure Treated Lumber Need to be Sealed?
While pressure-treated wood has a chemical to keep pests away and protect from some moisture and rot, it’s not enough to keep it in great shape. A sealant offers the best protection against excess moisture.
What’s the Difference Between Staining and Sealing?
Some people think that deck stains and sealants are the same, but they are two different products. Sealants create a layer on top of the wood while stains penetrate the grain. While sealants and stains can change the color of the wood, a sealant works like a coat of paint by adding a pigmented layer. A stain uses pigments that are absorbed into the wood to change the wood’s color.
Stains do not offer as much protection as sealants and should only be used for cosmetic purposes. If you want to use both products, it’s generally recommended to stain the wood first and then apply a sealant.
Are you Preparing for a DIY Home Improvement Project?
Don’t let your composite, PVC, or wooden deck suffer from wear and tear! Contact Capitol City Lumber for professional deck sealing solutions today!
If you’re preparing for any DIY improvement project that involves wood products, Capitol City Lumber in Raleigh is here to help. We offer lumber, wood siding, hardwoods, wood panels, hardware, and more. We are your one-stop for all of your project needs.
Call us today at 919.832.6492, order online, or reach out to us online to learn more about our products and how we can help with your next DIY home improvement project.

